Deploy a Unit

The Deploy panel displays additional options that enable based on your system configuration. Selecting a certain unit may display options not found when selecting another unit. For example some units may have a set number of predefined positions and other units may allow you to define position requirements as needed.
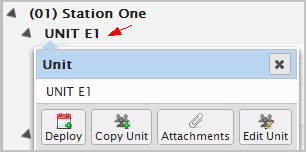
  1. Go to the Roster.
  2. Click on a unit to enable your options.

  1. Click Deploy.
  2. Use the Details panel to change the date and shift times using the From and Through fields and Calendar icon. Format: MM/DD/YYYY 00:00.

    The Duration field defaults to hours. Valid durations include hours, days, and Weeks. To use Days review the Deploy Unit Across Days topic for more information.

  3. Go to the Unit panel to select the desired unit in the Unit menu box - OR - go to the Special Deploy menu box to select a backup unit if available.
  4. Your position options for the selected unit enable and you can either: select the positions if this unit contains predefined positions - OR - click Add to define your position requirements.
  5. Click Save to confirm your settings and close the panel >>> OR <<< select Deploy Another prior to clicking the Save button to retain the Deploy panel open and set up another event on the same day or a different day.

    The configuration of the organizational structure AND the unit’s assigned shift determines where the unit displays on the Roster upon deployment; for this reason you may find that the deployed unit sometimes displays at the top, bottom, or in between the Roster. If this is the case, create a custom roster view for special event units only.