To use Custom Reports your product registration
key must include the Report (R) add-on module as an option.
This
task requires:
- Jett Reports knowledge.
- Access to the System page
- Reports Authority granted - Setup > System > Authority Levels
- View Roster granted - Setup > Security > Authority
Follow the steps in the order shown below to create
and run a single custom JETT report:
- Go to System > Custom Reports
- Click Add, to create a new custom report.
- In Name, label the report.
- In Report Type, select JETT Report.
- In Data Source, click Add to open the Report
Data panel.
- In the Criteria panel, select the
desired standard report from the Data Source menu box. This
is the Excel data source template and the report’s layout without
any modifications.
- Use the Limit By settings to include specific
information in the selected Excel data source report template. The
options and limits presented vary and based on the selected data
source report template.
- Click OK to generate your new Excel data source report
template. This report template includes the data limitations specified.
- Supply dynamic dates in the Dynamic Dates panel.
For example, TODAY, TODAY+7days, TODAY-1day
The same dynamic date applies to all of the report templates if
multiple templates exist. Date properties within each report vary.
When multiple reports with varying date properties are used, only
the date properties for the given report enable and pass data.
- Click Save to embed the default date in your data
source template(s).
- (Optional) - To view all of the field items available
within the selected report(s) return to the Data Source panel and
click Download Source Guide.
- Click Download.xslx file to obtain the template
or layout of the selected report in Excel format. This is the data
source template; the layout of the report which includes any data
limits and the dynamic dates supplied.
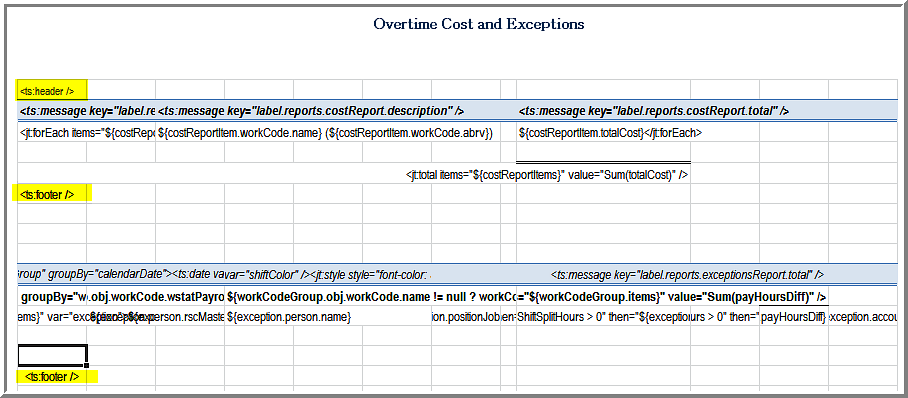
- Open the Excel data source template and customize as
desired. For example, you may add a header, format the font, add
borders, highlight, add text, remove column data, protect the workbook
with a password, and more.
To combine multiple reports, download all of the necessary data
source templates first. Open the primary report (the first report
of multiple reports). Open the next report, then copy and paste
the contents into the primary report. Be sure that you have enough
empty space or ‘rows’ between each report template, and omit the
<header> line entry on all of the reports, except the primary
report.
- Optional - Add a password to protect your
workbook from being modified using the built-in function in Microsoft
Excel. If the custom report is left unprotected users may modify
this custom report when they generate the report in the Reports area.
- Save your new template and then upload this template
in the Upload Custom Template area.
- In Custom Template, select the check box next
to Run/download report immediately to view and test your
report upon upload. Optional step, however recommended.
- Upload the new template, modify if needed. If you modify
the template, save it, and upload it again. Repeat these steps until
the report is ready.
- Click Save to save the latest draft.
- Click Publish to share the report with others
and make the report accessible in the Reports area.